How to Use a Mask Panel to Create a Face Mask
Recently, we have seen lots of pre-printed mask panels pop up in shops for use in making face masks. There are some really cute designs out there! Today, I'm going to share a quick tutorial on how to create a face mask from mask panel fabric with a center seam, using our pattern.
Because our pattern has a vertical center seam, using a pre-printed design can be a little tricky. Follow these simple steps below to make your next mask look great!
First, you'll need two panels, or two pieces of the same design that you want to use for your mask. This is because the center seam will take up 1/2" of the printed design.

Next, find the vertical center of your design. Lay a see-through ruler 1/4" to the right of your center and draw a vertical line with an erasable marking tool. I like the Mark-Be-Gone Marking Pen in Blue. Next, do the same thing on your other panel piece, marking a line 1/4" to the left of the center.


Now, it's time to cut out each piece using your mask template. Lay the template down on one half, lining up the top and bottom edges of the mask pattern with the cut piece, and making sure that the side with the straight edge is parallel with the mask fabric edge. It's okay if the mask fabric is not as wide as your template. Once you have your template in a good spot, use a pencil to mark registration lines on the curved center seam edge of your paper template where colors change on the fabric below. Now, carefully cut out this half of your mask. I like to use an Olfa 28mm rotary cutter for this job.

Once you have the first half of the mask cut out, take your template to a sunny window and transfer the pencil marks that you made to the other side of the template, so that you can use them to line up your fabric for the other half of the mask.

Flip the template over and cut out the other half of your mask from the matching second panel piece, carefully lining up your pencil marks with the color changes.

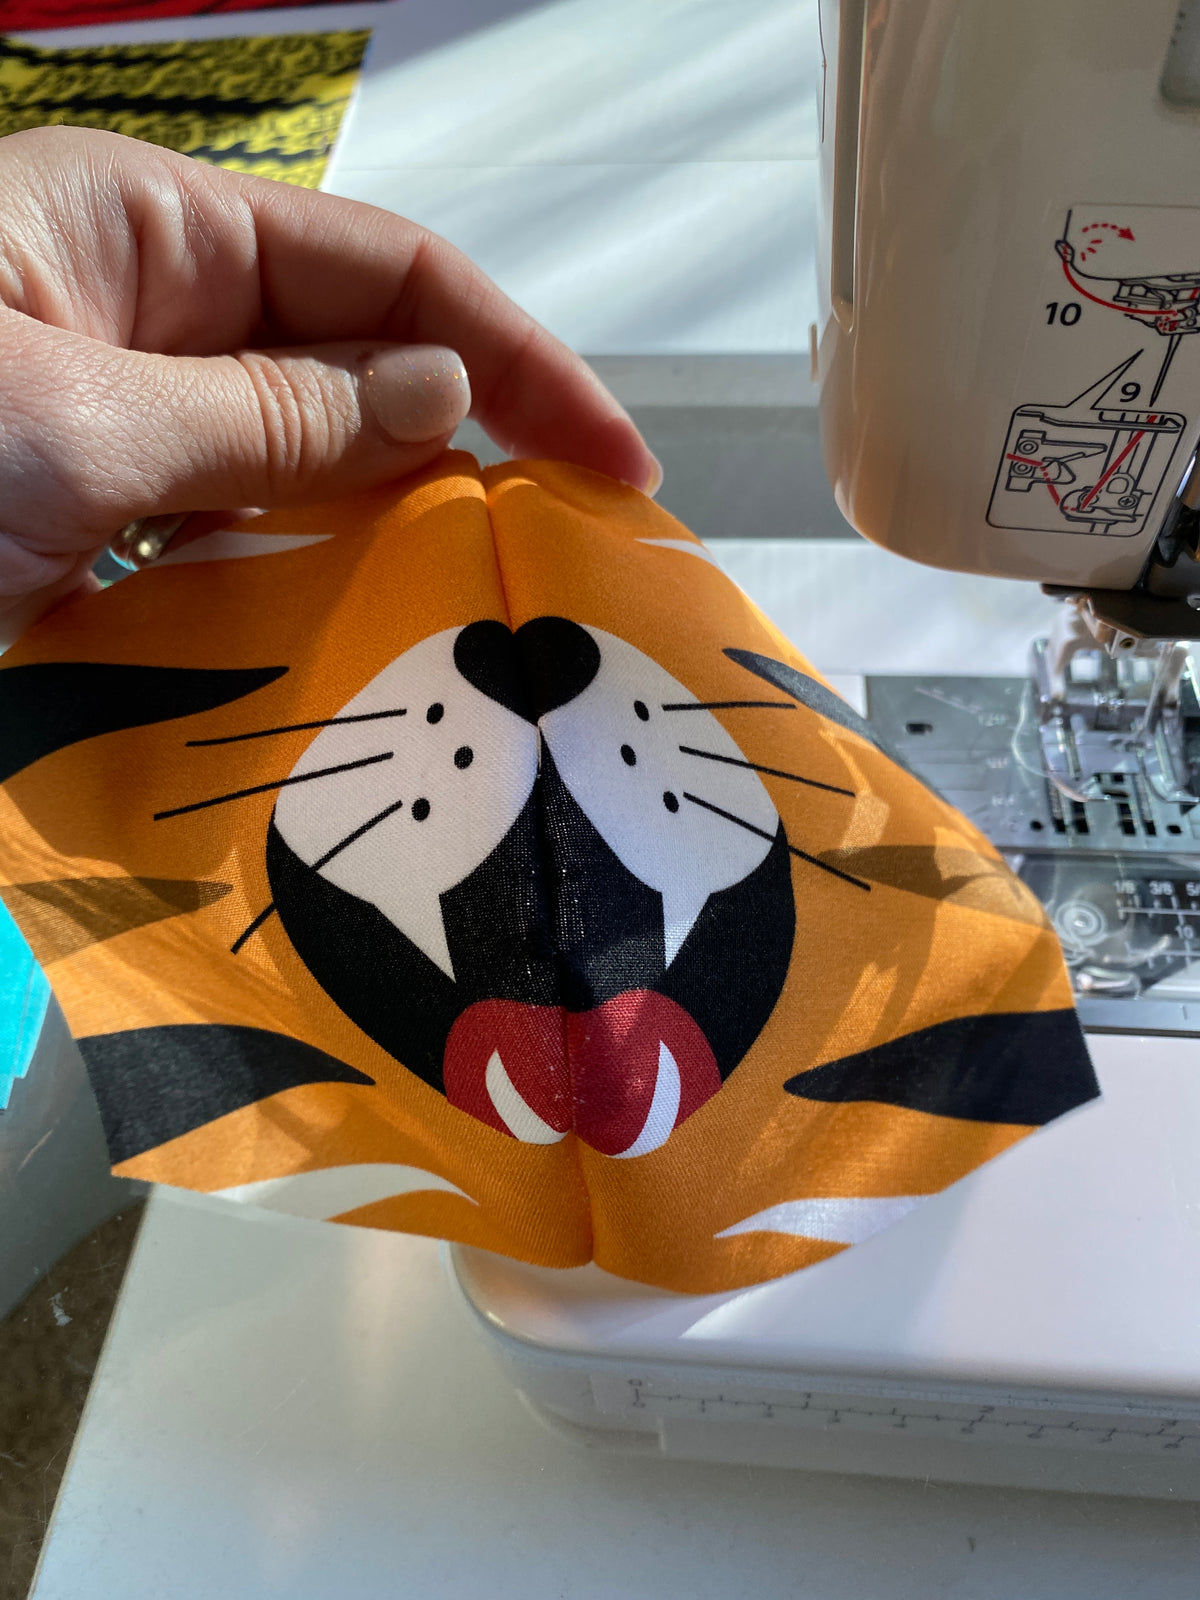
You can see that there is some overlap when you put these two pieces side by side. Now it's time to sew them together! I use straight pins to match every place where the color changes.


Once the registration pins are placed, I pin like usual and pull out the registration pins. Now, sew a test seam down the middle using a large basting stitch on my sewing machine to check fabric placement. Open it up to check.

If everything is well lined up, sew over the basting stitch with a regular stitch. If things are not lined up well, you can easily remove the basting stitch and re-position your fabric. Note that because of the slight curve in this seam, everything may not line up exactly perfectly. Focus on the top and center of the panel, and just do your best! Remember that the bottom of the mask curves below your chin, so not many people will see it.

Here is the finished side of this mask. (If you look closely, you'll see that I had to adjust my basting stitch - you can still see the little holes!).
The neat thing about our mask pattern is that it's reversible, so you can use another adorable panel design for the other side of your mask!
Here's another tip for you: I like to sew the elastic on the tops of each side of a mask and then use Wonder Clips to temporarily hold the elastic on the bottom so that the recipient can choose how tight to make it (without the fear of poking themselves with pins) before you sew it down and finish the mask.
Here is our mask pattern again, if you would like to use it: Click Here
If you have to wear a mask, it might as well be a fun one!
- Julianne